Showing posts with label Pasta. Show all posts

Tuesday, November 11, 2014

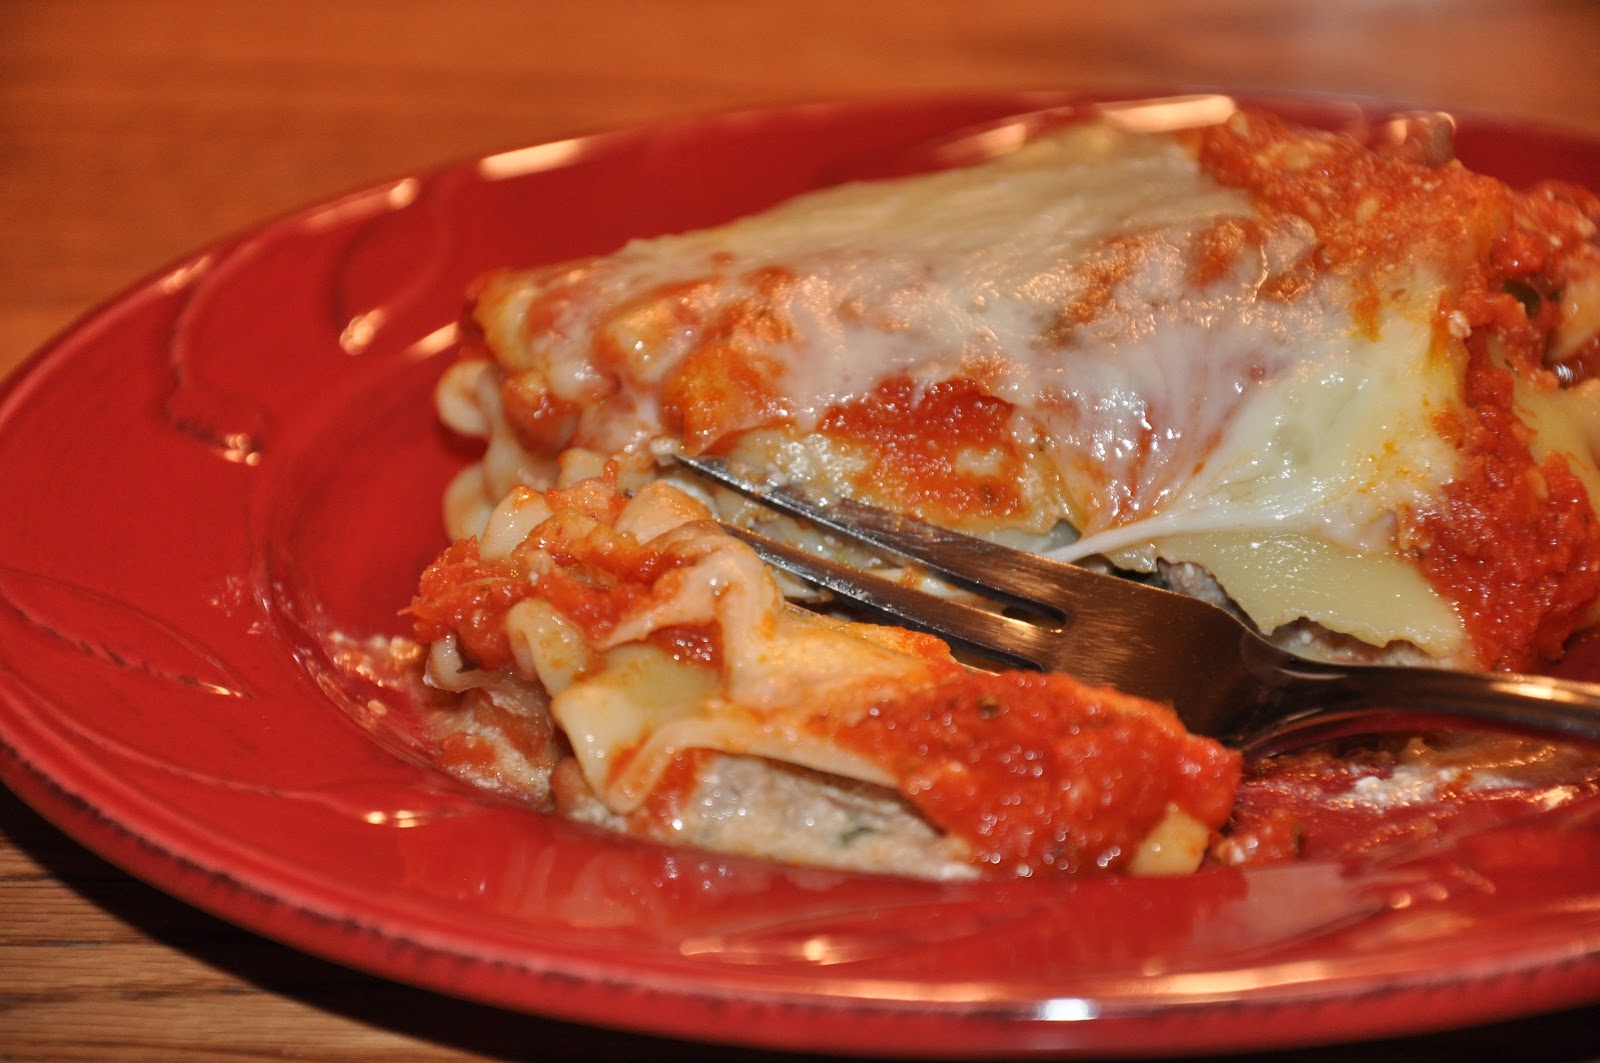
Classic Italian Lasagna


I've never realized that what we assume to be "real" lasagna in our little corner of the world is NOT "Italian".  In case you don't know what I'm referring to as Utah Lasagna - it's typically long, curly-edged noodles layered with ricotta cheese/egg mixture and red meat sauce smothered in cheese.  

Apparently, that is not real Italian lasagna.  A few friends have enlightened me that the real deal does NOT have ricotta cheese and/or eggs (or if you are in Utah, cottage cheese - because most of us try to watch our pennies).  What it does have is a homemade white sauce layered with a rich red sauce with browned veggies blended into it.


The flavors are wonderful together.  My favorite part though, is the absence of a watery lasagna that flows all over your plate.  Of course, you do need to let any cooked lasagna rest at least 15 minutes before you cut and plate, which helps it hold it's shape.

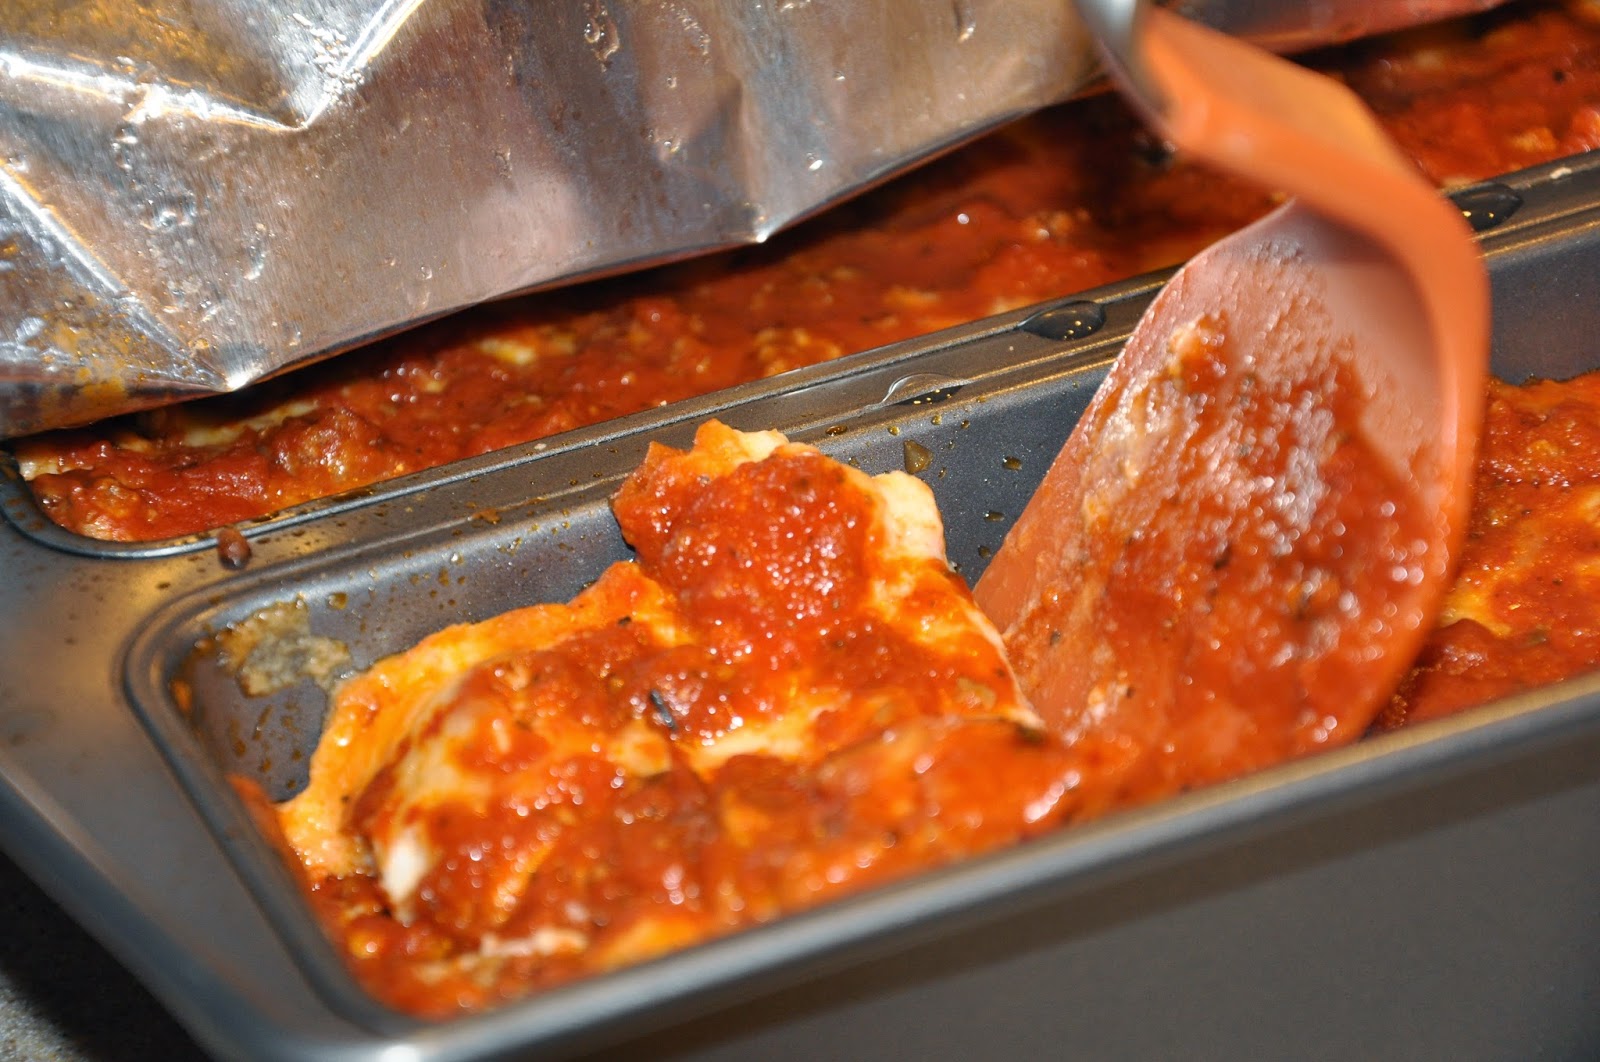
If you've never used a lasagna pan, it makes for easy layering and serving.


This recipe has ground turkey instead of ground beef.  I like to mix the two, so the beef flavor is still there.  You may also use either no-boil pasta or regular.  If you use regular, only boil it for half the recommended time.  

I LOVED this lasagna - I much prefer it over the ricotta/cottage cheese Americanized version.  


Classic Italian Lasagna

Ingredients:

Red Sauce:
2 Tbs olive oil
1 Tbs butter
4 cloves minced garlic (or 1 tsp minced dried)
1/2 large onion, diced (about 1/2 cup)
8 oz mushrooms, washed and chopped
1 15-oz can tomato sauce
1 6-oz can tomato paste
1 15-oz can diced tomatoes, undrained
2 tsp Italian Seasoning (or mix of dried oregano & basil)
1/2 tsp salt
1/2 tsp pepper

White Sauce:
3 cups milk (not skim)
4 Tbs butter
5 Tbs flour
1/2 tsp salt
1/2 tsp pepper

Lasagna:
9 lasagna noodles (boiled for half the recommended time) - OR - 12 non-boil noodles (Barilla brand works well)
1 lb (+ or -) mozzarella cheese, shredded
8 oz parmesan cheese, shredded (or use 1-1/2 lbs 3 cheese blend in place of all the cheese)

Directions:

Cook and drain meat, set aside to add to red sauce later.

Add olive oil and butter to a large, deep skillet.  Heat, then add chopped onion and mushrooms.  Cook until limp and translucent.  Add garlic last.  Add tomato sauce, tomato paste, and diced tomatoes.  Heat together at a low simmer for about 30 minutes to develop flavor.

Use an immersion blender (or remove to a standing blender) to puree as desired (you may also reserve part of the diced tomatoes to add later for a little more texture).  At this point, add Italian Seasoning and salt & pepper.  Stir in reserved ground beef/turkey.  Set red sauce aside.


Prepare white sauce by melting the butter, adding flour and seasonings, then whisking in the milk.  Stir constantly as you cook until thickened - being careful not to scorch.  Set aside.

Boil noodles as directed for half the cooking time recommended.  Remove most of the cooking water, leaving just enough to keep them from sticking to one another.  


Now, to layer:  Grease a large, oblong pan (or use a Lasagna pan, as shown - a great tool for more than Lasagna)  If using no-boil noodles, layer four per layer (overlapping slightly as shown).  If using boiled, use three noodles per layer.  


Layer the red sauce, then drizzle the white sauce over, then a generous layer of cheese.  Repeat layers two more times.  I like to reserve enough red sauce that it is the final topping.

Cover lasagna with foil, and bake @ 350° for 30 minutes.  Remove the foil and let lasagna sit for 15 minutes before cutting and serving.  


To prepare ahead, bake as directed for at least 15 more minutes.  You can freeze unbaked lasagna for up to 3 months.  If you freeze before baking, bake from frozen for 1-1/2 hours, covered.  Then remove cover and bake for another 45 minutes to one hour until hot and bubbly.  


Recipe source:  adapted from melskitchencafe.com


Tuesday, October 8, 2013

Mini Mac 'n Cheese Cups


(We didn't have time to focus on photography... in the heat of the moment, we were lucky to get these)

This is a fun idea for either a main dish item in a buffet, or to serve as an appetizer for a party, shower, or other event.  These are a bit more “special” than regular mac ‘n cheese, but still have the same appeal for those who crave a little comfort food.  Small portions are easy to serve (and hard to resist!)


My daughters & daughter-in-law hosted a baby shower for my daughter-in-law Rachel last weekend.  I love to turn events over to them - they enjoy a challenge and an opportunity to use their talents.  (And I love the fact that it turns out beautifully and all I have to do is pay for it!)  


Since it was an evening shower, and several who were invited came straight from work - we made it a light buffet.  Plenty to choose from if really hungry, but also not too heavy if they were on their way to dinner afterward.


We served Mrs. Mecham’s Salad, mini-muffins, single serve size Key Lime Pies, and Chocolate Mousse.  (We always have to serve Orange Water too)  These little Mac ‘n Cheese Cups went well with everything else, and were easy to serve.


My daughter-in-law Rachel loves an occasional splurge of Fried Mac ‘n Cheese at Cheesecake Factory - and we wanted to serve a few of her favorites (notice the Sour Patch Kids)

I won’t lie - the Boursin Garlic & Herb Cheese was a little pricier than I anticipated.  But the flavor was marvelous.  I had my doubts as I combined everything and put it into the cups - but I was pleasantly surprised at how tasty they were.


These warm in the microwave, but don’t have the same great texture as when they are fresh from the oven.  (Microwaving is a little tricky if you use metallic muffin cup liners as I did... always remove first.)  I made them an hour before, and then kept them in a warm oven until serving.

For the recipe - go to:
www.changeabletable.com

If you're interested - here are a few things we did at the shower.  Thanks to my wonderful daughters & daughter-in-law who put their heads together (by phone & internet & Pinterest) - this turned out to be a really fun night!


Rachel loves everything BUTTERFLIES...
We had fun rounding up the butterfly LED string lights, poking butterflies into
the wheat grass pots (instructions are HERE),  and spray painting the plates we found
at DI.  We used a fun little item called Serve It Up to stack the plates into tiered stands.

Using Rachel's nursery colors (orange, purple, and pink) - I had so much fun
making this butterfly quilt.  Can't wait to see my new little granddaughter in it...
This game is self-explanatory - but it was so much fun.  

The high chair (my husband made this for our kids - it folds down into a rocking chair)
made a great place to set up the Baby Scents game.  Guessing what each baby food was
was much harder than you would have expected.
My daughter Aryn adapted one of our favorite games (Telestrations)
using baby terms.  Like the telephone game, but drawing what you pass along.
My sister sketched out (what she thought) was "Baby Blanket"
My guess?  "Diaper Pail".
We won't say what this one was...
Rachel is going to make a beautiful mother.  Can't wait.


Wednesday, March 14, 2012

Easy-Serve Lasagna Rollups


The worst thing about serving lasagna is getting it out of the pan and onto your plate in one (recognizable) piece.  The thing I loved about this recipe is that it is simple to transfer without it falling apart. And not only is it easy to serve, but it’s just as simple (and fast) to assemble before baking


There are so many things that can go wrong in putting together your favorite “take-to-your-neighbor” lasagna.  Sometimes it turns out too saucy, other times too dry.  It’s the most unpredictable pasta dish I’ve made.  I tried it so many times when my kids were young that some of them would start to cry when they found out we were having lasagna for dinner again (you know who you are!)

When I finally ‘got it right’ - then the kids left home.  And you don’t make lasagna when you live alone (or you’ll have leftovers till the cows come home - or maybe those kids)  But I still crave a good lasagna occasionally.

When I saw this idea for roll-ups, it didn’t say anything about it being easy to portion out and serve.  But it seemed to make sense that it would be.  The thing that makes it tricky to serve lasagna (let alone assemble it) - is all those layers.  Keeping them stacked evenly in the pan, then moving them onto a plate without everything falling apart is quite a process.  The stars need to be aligned so you can get it on a plate without it oozing all over the place.

One key to easy assembly is making sure the noodles are fairly dry and the filling is not too warm.  Then everything adheres long enough for you to roll them up without it squeezing out.  The recipe photos will show you a few tricks you may not have thought of - (I learn something every day)

From one recipe I was able to make four individual portions (for me), and a larger pan that would serve six (for when the kids ‘drop by’)  This freezes well and is great to keep on hand.

For the recipe with step-by-step photos - go to:


Monday, March 7, 2011

PW Mac 'n Cheese For a Crowd


You have to admit, there’s just no comfort food like a big plate of Mac ‘n Cheese.  I’m not talking about the Blue Box variety - it has to be rich and homemade.  My daughter made this for me when I spent a few days with their family - and I am a born again Mac ‘n Cheese lover.  I have seen the light... this is IT.

Now that all my kids have relocated and are on their own, I find myself longing for the good old days.  It only happens occasionally, (because I love my freedom) - but it’s a real longing to slip back into those “Mom” days by making a kid-friendly, carb-loaded, comfort food main dish.


My daughter’s family (three little boys - need I say more?) embraces any main dish that consists of pasta, white sauce, and cheese.  There’s nothing green, slimy, or “nutritious” here - so there are no power struggles when this is on the menu.  Every family needs at least ONE favorite weeknight meal where kids don’t need to be bribed to clean their plates before dessert is served.  

This is (of course!) a Pioneer Woman favorite.  Trendy it ISN’T - kid pleasing it IS.  And I have to admit, I loved having these leftovers for dinner almost every night for a solid week.  I didn’t feel a bit guilty.

For the recipe, photos, and instructions - go to:

Wednesday, February 16, 2011

Weeklong Chicken Pasta Salad


I’ve been on a week-long salad kick, and I can’t believe I’m still enjoying this.  The beauty of this salad is how well it keeps when I mix just one portion at a time for lunch.  The initial prep work is minimal, and then I store it in a gallon-size ziploc bag - taking out a single portion each time.


I’m not a raw pepper fan, and I only like raw broccoli a few sprigs at a time on a relish tray - so it makes no sense that I consider this a new favorite salad.  There’s something about how it all combines that has earned my admiration.  


I found this via cjaneinthekitchen, who listed her source as recipeshoebox.   These are both fabulous sites - you'll want to check them out... 


I’m usually too busy to stop what I’m doing at lunch to make a complicated meal.  When I piece and snack instead, I really pay for it by evening when I’m so hungry I overdo.  This simple salad has everything going for it - just enough (but not too much) pasta, protein in the chicken & cheese, and lots of fresh vegetables.  The initial dressing is light and tangy, which is then nicely complimented by adding a bit of ranch just before serving.  

It’s quick to pour into a bowl, add a bit of ranch and additional cheese, stir, and enjoy.  No fuss, hearty (enough), and sensibly healthy.

For the recipe, photos, and directions - go to:

Monday, October 11, 2010

One-Kind-Fits-All Mac 'n Cheese


There are two distinct camps for mac ‘n cheese - kids & adults.  Rarely can you find one that pleases both.  After playing with ingredients & amounts, I’ve found one that my grandkids will inhale - and even the adults are satisfied with.  The topping jazzes it up, and just a hint of processed cheese adds a touch of “blue box” for the kids.


I’ve tried just about every homemade version of mac ‘n cheese out there.  The truly ‘homemade’ versions have wonderful flavor, but the cheese curdles during baking.  The ‘kid-friendly’ versions resemble the blue box variety.

I found a few ‘gourmet’ recipes calling for several types of foodie cheeses that I couldn’t even pronounce, (let alone FIND) in any of the real stores I shop at.  I decided to make a down-to-earth concoction using ingredients I could afford, talk little people into trying, and feel good about.

I don’t like to unearth my mac ‘n cheese from beneath a heavy topping - so I’ve included two amounts, and you choose the heaviness you prefer.  Part of the reason I like making my own mac ‘n cheese is so I can control the preservatives, processed ingredients, etc...  So, I’m sure you’re wondering what is up with the processed cheese?  Adding just a few slices keeps the cheese sauce from curdling - so I can overlook one evil for the result it yields.


Large elbow macaroni makes a real difference.  The larger diameter makes it easier for the cheese sauce to enclose the pasta - inside and out - making it extra tender and creamy. 


For this dish that the kid in everyone will love, go to:

Thursday, August 19, 2010

Save-a-Trip Alfredo Sauce


Alfredo sauce is a staple for pasta lovers - and when I really need it, I often find myself without.  To save a myself from a last-minute trip to the store, my daughter shared her husband’s family recipe.  If you find yourself frustrated with lumpy, greasy homemade Alfredo - you may want to give this a chance.


I’ve found that most Alfredo sauce is loaded with fat (in one form or another - usually coming from cream, butter, and cheese).  This version is a tad more heart-friendly - although I’m not claiming it would be endorsed by the medical profession.  You might make it healthier by substituting milk for the heavy cream.

My daughter has mentioned this family recipe works well when she needs a jar of Alfredo in a hurry.  It isn’t complicated to make and can be simmering while your pasta and other ingredients are being prepared.

I also like the fact that it turns out perfectly smooth - unlike most others I have tried to make at home.  I haven’t tried it with reduced fat ingredients, and I would be interested to know how it turns out with those changes.  Using fresh garlic instead of garlic powder would also be worth a try for more authentic flavor.

I used what I had left of Basil/Lime Buttermilk Grilled Chicken, along with Fusilli pasta to make a delicious homestyle version of Chicken Alfredo.

And best of all - no last minute trip to the grocery store.


For the recipe, go to:
www.changeabletable.com