

Showing posts with label fruits. Show all posts
Showing posts with label fruits. Show all posts
Monday, August 8, 2016

Wednesday, July 6, 2016

Saturday, June 27, 2015
Razzleberry Slab Pie

This piece of pie was the only one left that I could take a picture of. I took two of these pies to the Church & Family History Headquarters Mission I serve at in the Joseph Smith Memorial Building in Salt Lake City, Utah. (That's the reason I'm posting MUCH less lately... I'm loving my Church Service Mission) They didn't last long. I have to admit, this is one of the best pies I've made - and that surprised me.
I make a LOT of pies, yet I have never been able to master berry pies. Cornstarch, flour, tapioca - they all thicken a berry pie - but they don't showcase how pretty the berries are. Another disadvantage of a using these thickeners is what they do to the flavor. Heavy starches mask the fresh taste of berries.
So... enter "PIE TONE". What is it? There are two kinds - Red and Plain. Here is the difference:
Berry Red Pie Tone has been used for years in berry pies and wonderful glazes that can be used as a topping for cakes or other desserts where the red color and berry flavor is already in the mix. For use with red or darker fruits. (Think "Danish Dessert" on steroids)
Plain Pie Tone has been used for years for the same purpose. However, Plain Pie Tone is used for all other pies that require a clearer glaze. It allows for making consistent pie filling.
Where do you get it? I have only found one source. Google it, and you'll find it on the Kitchen Kneads website (kitchenkneads.com) This is the location in Ogden, Utah. I buy mine at a store by the same name, but it's located in West Jordan, Utah - unfortunately, they do not have a website.
It's a little tricky to use, but once you get the hang of it - you'll never have gloppy or soupy berry pies. Just a beautiful, perfectly textured pie filling that showcases those beautiful berries that are too expensive to waste with the wrong thickener.

*This recipe makes enough for two large, deep dish 9-10" double crust pies.
One 4-lb bag of frozen tri-berry mix (a mixture of raspberries, blackberries, blueberries)
1-1/2 to 1-3/4 cup sugar (more or less to suit your taste)
So... enter "PIE TONE". What is it? There are two kinds - Red and Plain. Here is the difference:
Berry Red Pie Tone has been used for years in berry pies and wonderful glazes that can be used as a topping for cakes or other desserts where the red color and berry flavor is already in the mix. For use with red or darker fruits. (Think "Danish Dessert" on steroids)
Plain Pie Tone has been used for years for the same purpose. However, Plain Pie Tone is used for all other pies that require a clearer glaze. It allows for making consistent pie filling.
Where do you get it? I have only found one source. Google it, and you'll find it on the Kitchen Kneads website (kitchenkneads.com) This is the location in Ogden, Utah. I buy mine at a store by the same name, but it's located in West Jordan, Utah - unfortunately, they do not have a website.
It's a little tricky to use, but once you get the hang of it - you'll never have gloppy or soupy berry pies. Just a beautiful, perfectly textured pie filling that showcases those beautiful berries that are too expensive to waste with the wrong thickener.

Razzleberry Pie
*This recipe makes enough for two large, deep dish 9-10" double crust pies.
One 4-lb bag of frozen tri-berry mix (a mixture of raspberries, blackberries, blueberries)
1-1/2 to 1-3/4 cup sugar (more or less to suit your taste)
3/4 cup pie tone (red or plain - as desired)
1 cup water
Directions:
If using frozen berries, you'll need to allow them to thaw in a strainer over a large bowl and collect the juice. This juice can then be used as part of the 3 cups water above. If using the berry juice, you can get away with using the Plain Pie Tone (as it will provide extra color and flavor)
However, if you are like me - and totally forget to thaw your berries - go ahead and microwave them. Place bag in microwave for a few minutes on high - then shake the bag and repeat until the berries are no longer frozen solid (but not hot and mushy either). Place in strainer over a large bowl and allow juice to drain. You may use this juice (as above) as part of the 3 cups water.
In a large measuring cup, measure 1 cup water. Add 3/4 cup pie tone and stir until combined. It will act somewhat like cornstarch added to water, and the pie tone will settle to the bottom if allowed to stand very long. When it does, just stir it again before adding to the syrup in the next step.
Place the 3 cups water (use juice as part of this measurement if you wish - it makes the flavor/color better) in a saucepan. Add sugar and stir as you bring it to a boil over high heat.
Now add the mixture of water/pie tone, stirring well as you continue to heat. The mixture will quickly thicken. Bring to a boil. Remove from heat and cool slightly before adding reserved berries.
Use immediately in pies, or use as a sauce over cakes or other desserts.
For this amount of filling, I made two batches of Never Fail Pie Crust and made two slab pies. Each "slab" was baked in a half-size aluminum baking sheet. I wish I had better pictures - these didn't last long enough to take any good ones.
Bake at 400° for about 45-50 minutes, or until golden brown. I always add a milk, vanilla & powdered sugar glaze to drizzle over the cooled pie. This makes it even better - ask my kids.
Tuesday, May 7, 2013
Peach Glazed Fruit Salad

I don’t say this about most recipes, but I will about this one. I haven’t found anyone who does NOT like it. If this is next to several salads on a buffet - it will be gone at the end of the event. Not sure why. Must be a combination of the flavors, colors, and the use of fresh fruit. The glaze ties it all together.
I wish I could remember where I picked up this recipe. It’s so simple, it’s almost redundant to write instructions. But, for the sake of all us “recipe Nazis” out there that need it - I’ll include them.


For the tips and suggestions that make this a "recipe" - go to:
www.changeabletable.com
Monday, August 27, 2012
Peach Crunch

I make this recipe every fall after I finish bottling peaches - kind of a “second chance cobbler” of sorts. No matter how careful and diligent I am - I always have at least 1 or 2 bottles that fail to seal. This delicious recipe is one way to use up the fruit that didn’t make the grade. Easy, fast, tasty.
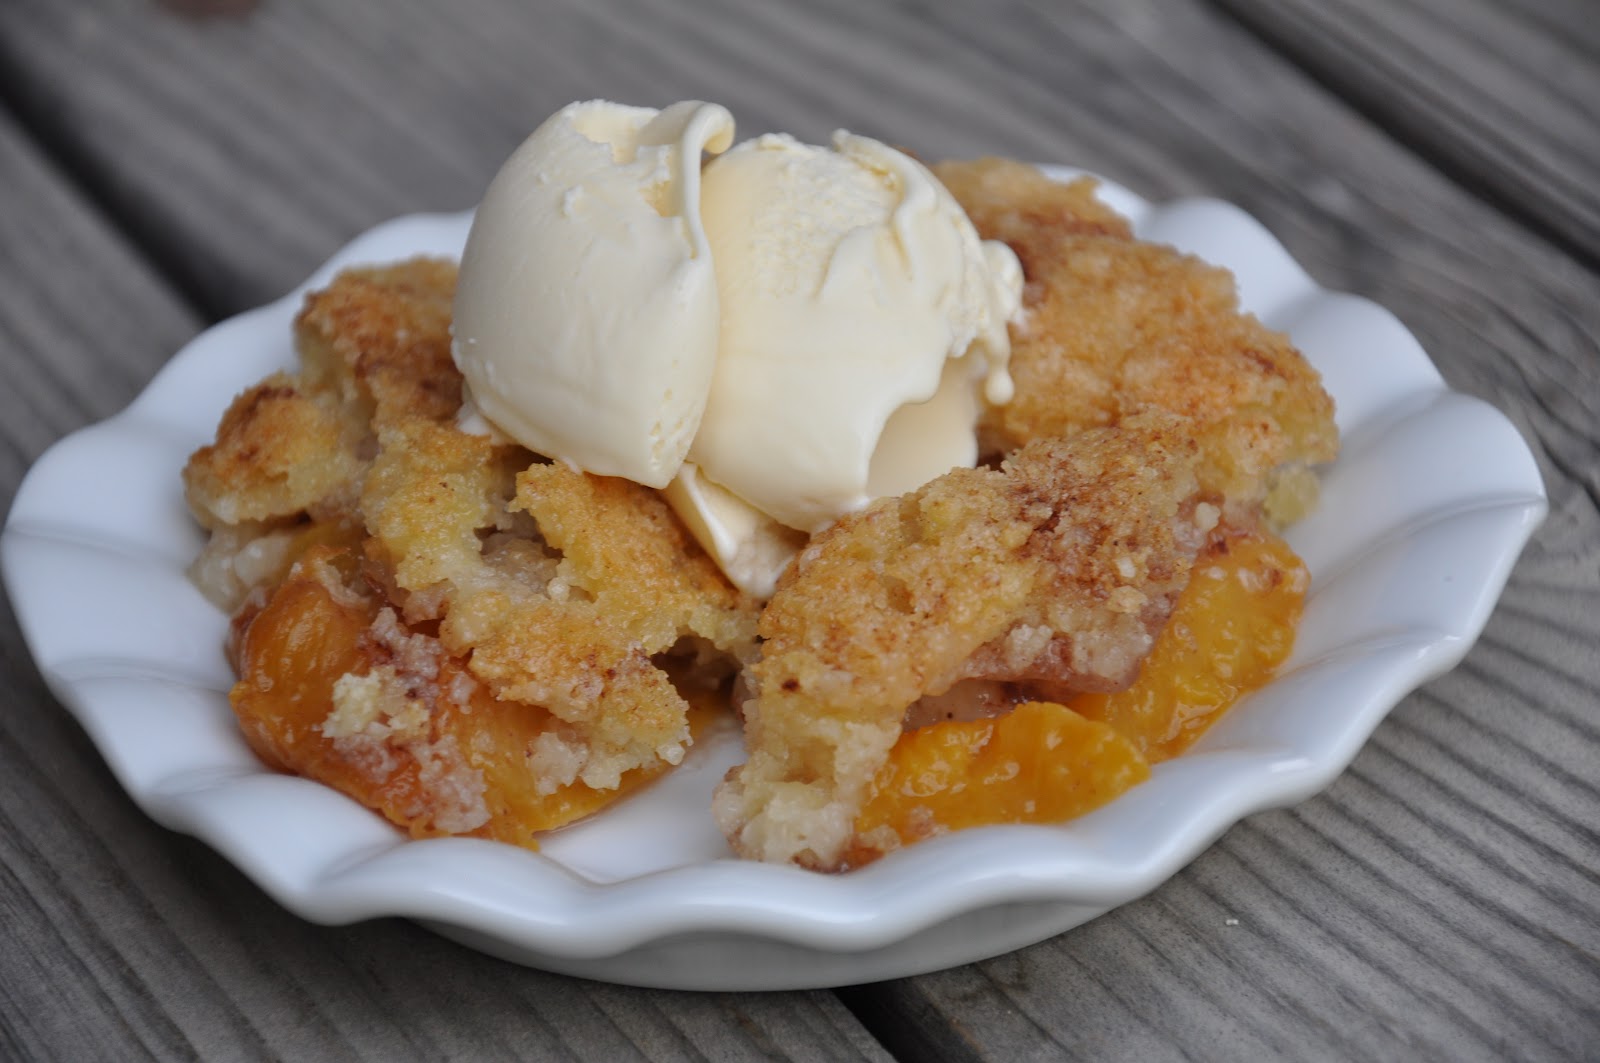
Over thirty years ago we had a young family and my husband had his first teaching job at a middle school in Sandy, Utah. Somehow he was the lucky person in charge of part of the faculty BBQ held right after school began in the fall. The principal’s wife (Susan Sproul - who I’ve lost track of, and wish I could locate again...) brought this dessert to one of the very first BBQs that was held. When I asked her for the recipe, she told me she uses it for those renegade bottles that don’t seal when she bottles peaches. Ever since then, that is when I make it.


The full recipe can be found at:
www.changeabletable.com
Wednesday, July 11, 2012
BMP (Berry/Melon/Pineapple) Smoothie

After a major Summer holiday (such as the 4th of July) - I would bet the majority of us have at least a few slices of watermelon hanging out in the refrigerator. Combine it with two other ingredients for a fabulous smoothie that will leave you wondering “what’s in this?” One little trick makes it even better.

My daughter Aryn introduced this (very simple) smoothie to us at our family reunion last week. We had spent a long day playing at the lake - and we returned very sunburned, hungry, and thirsty.

Earlier in the week, Aryn asked me to pick up just three ingredients so we could make this. I did as she asked - and for convenience, I cubed the melon and pineapple beforehand, then stored them in ziplocs to take on our trip.

Although I had cubed the watermelon beforehand, we used up the leftover slices of watermelon we had taken to the lake that day. Normally it would have been long forgotten in the refrigerator after a few days. This was a nice way to use them up and not let them go to waste.

I took along my blender (my favorite kitchen appliance lately), and it made short work of these smoothies. Two batches fed 19 of us. It was perfect served alongside the Cafe Rio spread she had made ahead of time (that recipe is here).

I’ll tell you - that was a terrific meal. It really hit the spot coming home wasted after being in the sun all day long.
 |
| No amazing photo-op... it was consumed in a flash! |
Just make sure your strawberries are frozen - that’s what makes it just the right texture of ‘slushiness’ - if you know what I mean. I guess it would still be great with fresh berries, but it was just frozen enough. No brain freeze, not too thick, and SO refreshing!
For the recipe, go to:
Thursday, December 22, 2011
Peeling Pomegranates... the clean way

Have you ever tried peeling a pomegranate without leaving tell-tale signs of bright red on your clothes and all over your kitchen? This method is so easy, you won’t be tempted to spend more than you should on the convenient Pomegranate Arils you find in the warehouse & grocery stores.
Whenever I see the double-bowls of pre-seeded pomegranates this time of year - I always take one, get right up to the check out, and then think better of it and run it back to the shelf. I have purchased them before, only to have them spoil before I can use them up. They are not inexpensive, and that’s a lot of money to spend on a pretty red garnish for a salad, only to throw most of it away.

Yesterday I found pomegranates at the grocery store for $1.25. I needed them for a salad (my all-time favorite salad... “Mrs. Mecham’s Salad” - the link is HERE)
I came home ready to wear the biggest apron I could find to keep from ruining my clothes. I wasn’t looking forward to red fingernails (and not the pretty kind) either.


I decided to do a search to see if there is an easier way to peel a pomegranate. I found a method that sounded simple, and gave it a try. Bingo - it worked like a charm!

Pomegranates are a concentrated source of antioxidants - and they are just beautiful and a pleasure to find in a salad. Enjoy!
The easy instructions with photos are found at:
Friday, September 16, 2011
Taffy Apple Salad

As in so many good foods - the secret’s in the sauce. I’ve wanted to try this every fall for a few years - and I shouldn’t have delayed so long. There are other salads by the same name, but they all taste like caramel (from brown sugar). This sauce isn’t as heavy (NOT like taffy) - and the apples really shine as a result.

There are literally hundreds of versions of Taffy Apple Salad out there - and most of them come from “Aunt ______” (fill in the blank). The ingredients alone would define it as a dessert - but most of us feel better calling it a salad.

It begins with a sauce made from pineapple juice, sugar, egg, and cornstarch. The true “caramel” versions include brown sugar & vinegar - making it taste similar to taffy. Most recipes call for marshmallows - and they all use whipped topping to complete the dish right before serving.

This recipe differs in that the sauce is added to the whipped topping while hot - making it slightly translucent, allowing the colors to show through.
 |
| This is the version where the sauce turns translucent because you add it to the topping while hot... www.stolenmomentscooking.com |
As you can see - I added the sauce once it was almost cool. Why, you ask? Have YOU ever forgotten to take the CoolWhip out of the refrigerator before you need it? I’m notorious for procrastinating that step. That’s why mine looks creamy enough to hide the beautiful fruit and nuts. Next time, I’ll follow the directions as stated.

Most recipes call for salted peanuts. I chose to add cashews instead - and I think even toasted pecans would be great. Next time I’ll add those right before serving to keep them crisp.
Don’t worry about refrigerating this for a few hours before serving - the apples don’t turn brown with all that sugar & acid from the pineapple. If you like your marshmallows to be soft and starting to melt into the sauce - add them at the beginning so they have time to break down. Whatever you do - don’t add the sauce while it’s hot (or even warm) to keep it from decreasing the crunch of the apples. (You don’t want then to taste stewed).

Everyone who tried this loved it - they were especially surprised to find cashews in the mix. (The only reason I used them is because salted peanuts aren't my favorite - I have expensive taste)
For this adapted version of a classic recipe, go to:
Monday, June 20, 2011
Strawberry Delight - from your childhood...

Making this again is like a walk down memory lane for me. Years ago, my husband and children couldn’t get enough of this. Nowdays I look at this as a “cheater’s dessert” - I would probably rate it a “2” on a scale of 1 to 10 (with “1” being easy, and “10” difficult) For summer, you can’t go wrong serving this old-time dessert.

My family is very sentimental when it comes to Sunday Dinner, and recipes from their childhood. They read my blog - and give me input, and they often ask me to post the recipes they loved as children. (So - hey guys - this is for YOU!) There is probably a version of this same dessert in every ward cookbook that was ever circulated about 20-30 years ago. Recipes back then used frozen strawberries in syrup because it would have broken the bank to buy fresh - except when they were in season. Now you can find them all year round - times are a changin’.
The Petersen side of the family loves desserts made with (what I would describe as) “soggy” ingredients. Think Banana Pudding (it has to be cook-and-serve pudding here - so the vanilla wafers get SOFT and mushy). It took me years to adjust to this mentality - why should I take something that I keep well wrapped to stay crisp - and then make it limp and moist?

But, I have to admit - this has grown on me. It’s especially good in the winter months when fresh strawberries are rare. If you’ve ever tried frozen strawberries in syrup - they are a far cry from the real thing. But that hint of fresh flavor is fantastic in January.

Since strawberries are everywhere right now - I opted to use fresh in place of frozen when I made this at the request of my daughter for Sunday Dinner yesterday. We all agreed that it really is more authentic (living up to our memory anyhow) when you use frozen strawberries in syrup. The strawberry cream mixture really seeps in better that way.

Have you ever googled “Strawberry Delight”? Well - you won’t find this one that way. Strawberry Delight is an old-fashioned recipe title that could be anything on earth (kind of like “Congo Bars” - if you know what I mean?) But I kept the title so my kids know it’s from their growing-up years.

I halved the recipe to make single size portions - and it still made more than enough for five. It’s also impressive when assembled in a large clear glass bowl or punchbowl. These mini-trifle dishes were fun as well.
For the full (and half-size) recipe - go to:
Monday, May 9, 2011
White Chocolate Raspberry Cake

Mother’s Day is only a distant memory today - but this cake isn’t. I think every mother deserves a dessert on that day that will “WOW” her.

I made this for my mother yesterday and we both decided it’s a great special occasion dessert. Every time I look in the refrigerator today... it's calling my name.

I thought this recipe would be complicated, but it just has a few more steps than a normal cake. The cake itself is moist and has a unique flavor - I could have stopped with the cake itself and it would have been worth the effort.

I can’t find the source of the recipe - as a good friend shared it with me and it was copied from an unknown book. The trickiest part is finding instant white chocolate pudding mix, as well as a cake mix without pudding. Most boxed cake mixes today are “pudding added” - and I finally found one in an off-brand. My friend could only locate this pudding mix in sugar-free - and it was just as delicious.


The cake is frosted with both a rich white chocolate frosting, and then a final coating of white chocolate cream topping. The rich first coat I would describe as a “crumb coat” - and doesn’t have to look perfect. The topping then smooths it all perfectly.

I was in a hurry yesterday because my missionary son was able to call on Mother’s Day (so much fun to hear his voice!) - so my chocolate “curls” didn’t receive much attention. Next time I’ll follow my own directions in this post (HERE) for a simple way to make your own chocolate curls.

The fresh raspberries make this extra special. You could use fresh strawberries or blueberries - but they are not as long lasting as raspberries. Costco has spoiled me with how amazing these berries always are - they almost look unreal, but I assure you they’re not!

For the complete recipe with step-by-step photos - go to:
Subscribe to:
Posts (Atom)