Showing posts with label gift ideas. Show all posts

Tuesday, October 11, 2016

Pet Ghost


Looking for a quick & easy spin on a Halloween treat?  These Pet Ghosts are a bit silly, but sweet.  You can find Wilton Candy Melts at most craft stores, and the Keebler Mini Graham Cracker Crusts at most Walmart stores.  The Peeps ghosts might take a little longer to find.  

Feel free to use the graphic to print your own label or sticker - or design your own.  Happy Halloween!


Wednesday, December 14, 2011

Peppermint Rice Krispie Treat Snowballs


When I ran across this idea, I had to try it.  Rice Krispie Treats are everyone’s favorite, but with a touch of peppermint candy?  Then rolled into balls and dipped in white chocolate?  What’s not to love about that?  Add a candy cane “hook” and you can hang it on your cup of hot cocoa on a cold night.


Just about anything can be shaped from Rice Krispie Treats - it’s hard not to find a recipe book without a variation of one kind or another.  I was skeptical of whether I would like them laced with crushed peppermint candy.  I can (enthusiastically) say that they are wonderful - you’ll be full of Christmas spirit at first bite.

Making these made me wonder who gets the credit for inventing Rice Krispie Treats, anyway?  (And - by the way - they are spelled “Krispies”, not “Krispys” - that spelling and name are trademarked by Kellogg Company)  Two Kellogg’s employees, Matilda Jensen and Mildred Day, are credited with their invention in 1939.  Similar recipes already existed at the time for Puffed Rice and Puffed Wheat - but they were very sticky, as neither used marshmallows - using instead other ingredients such as molasses (can you IMAGINE?)

Supposedly it took them two weeks to perfect the recipe.  These two women were home economists whose job it was to promote the cereals manufactured at Kelloggs.  Mildred’s daughter Sandra asked her why she never made the snack for her - and she said “If you’d made them for two weeks from 6:30 AM until 10:30 at night - you wouldn’t want to make them again, either.”  Touche’ Mildred!  The recipe first appeared on the cereal’s packaging in 1941, and they were sold as a ready-made product beginning in 1995.  

This recipe is just one (of many) variations of the original recipe - which, by the way, has NEVER changed.  


There are only a few hints to make this easier.  


One - don’t push the candy canes into the balls until they have cooled, but are not yet hard.  Two - dip the candy cane into the white candy coating after making the indentation in each ball (this helps it stay put so you can dip it)  Three - (this is important) don’t taste them until they are all packaged to give away, or you’ll have to make a second batch.

For the recipe, hints, and photos - go to:


.

Friday, December 9, 2011

Brownie Mix (with variations)


I think we have all become dependent on packaged brownie mixes - there’s probably one in every pantry.  This one however, is one you don’t have to get out a microscope to examine the list of ingredients.  It makes great Brownies, Texas Sheet Cake, and Chewy Chocolate Cookies.

The first brownie appeared in public during the 1893 Columbian Exposition, held in Chicago, Illinois.  The chef at the city’s Palmer House Hotel created it after Bertha Palmer requested a confection that was smaller than a piece of cake and could easily be eaten from boxed lunches.  This same brownie (which had an apricot glaze and walnuts) is said to be made today at the hotel using the original recipe.
Many people feel that brownies shouldn’t need to be turned into a convenience food - it is (after all) one of the most simple recipes out there.  There are some things that I can see buying a shortcut for - one of them being puff pastry!  But for those of us who occasionally want to make a comfort food like brownies without measuring our own ingredients - this mix is a great help.  Measure once, package, and save for a day you don’t want to think before you indulge.


It’s hard to find a basic chocolate cookie that holds up well when frosted, filled, or just eaten plain.  Most fall apart, are crumbly, or are tasteless.  The texture of this cookie resembles a brownie, yet isn’t heavy or dense.  The best part is it’s made from a (homemade) mix that even a child can make.


This cookie is a good base for a lot of our favorite things - nuts, marshmallows, cream filling, chocolate frosting... you name it - it’s always better on a chocolate pillow.  


This made another cookie kit for my grandchildren to use in their Christmas Advent Calendar.  


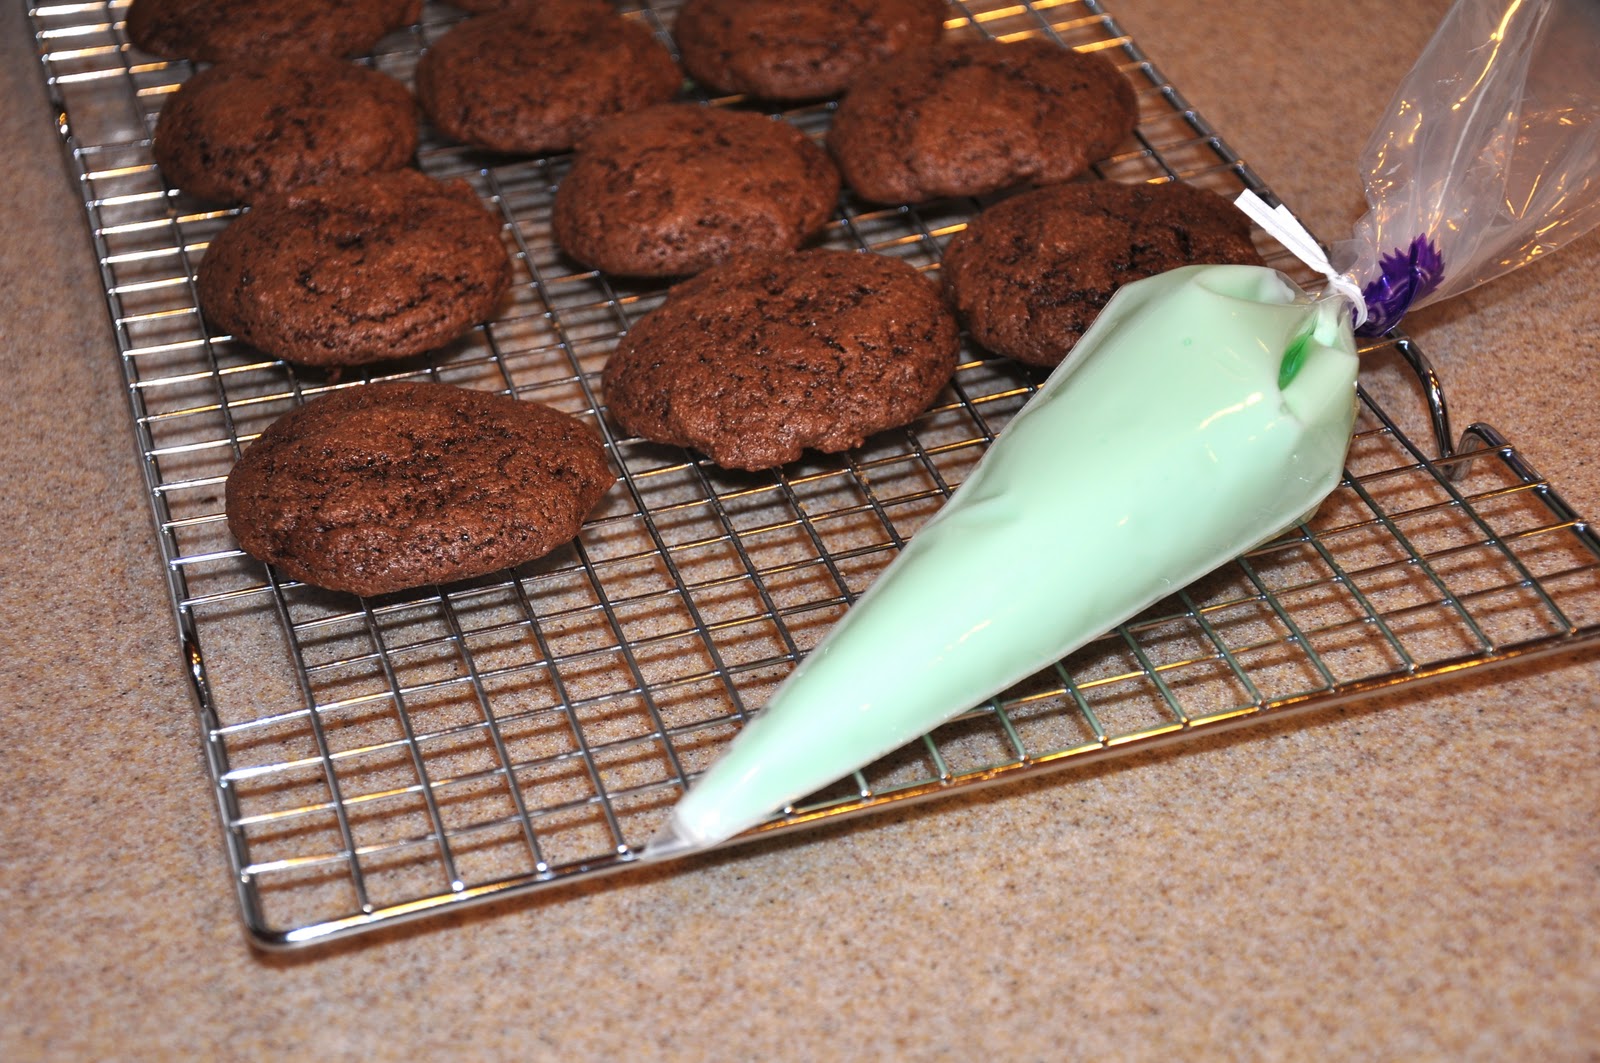
I placed a disposable decorating bag of mint frosting in with the cookie mix so they didn’t have to make their own frosting (that can be the last straw when you are making cookies with kids!)


The cookie comes together easily with only eggs, flour, baking soda, and a teaspoon of vanilla added to the basic mix.  They bake up puffy, yet chewy - ready to garnish.


I made Chocolate Covered Marshmallow Cookies, and Chocolate Mint Cookies from this basic brownie mix.  I was surprised by how good they were, and they stayed chewy for days. 

You'll find the recipe for the Brownie Mix HERE.

The Chewy Brownie Cookie recipe (with variations) is found HERE

Thursday, December 8, 2011

Basic Cookie Mix


Looking for a fun idea to give away to family, grandchildren, neighbors, co-workers, etc...?  One basic cookie mix recipe can yield a variety of different cookies.  These are easy to package, label, and hand out to those who would appreciate a little “convenience” this busy holiday season.


If you’ve ever tried to find a cookie mix that is even SEMI-healthy, you know how frustrating that can be.  I had to come up with cookie mixes to put in the Christmas Advent Calendars I made for my grandchildren - and resorted to a recipe that I used over 33 years ago.  Nobody makes their own mixes anymore... maybe its time to start?


I had to find cookie kits/mixes that would be used on three different days during December.  The first one was to make cookies for their school or Primary teachers, the second one to take to a family whose home they awarded “Best Christmas Lights”, and a third to take treats to their local (overworked) Post Office workers a few days before Christmas.


I looked everywhere.  The packaged mixes (in the cake mix section) had so many artificial ingredients that I could scarcely find “flour” and “sugar” in the list.  The refrigerated doughs were even worse, and those wouldn’t ship (or keep) well.  And then, when I looked at the ingredients on the cans of frosting, I decided it was time to make my own.  

I did a search on the web, but good recipes (for an actual MIX) are hard to find.  Most are for “cookies in a jar” - where the ingredients are layered in a mason jar.  They look nice, but whoever receives them has to provide butter, eggs, and several other ingredients.   

I took a look on my ANCIENT cookbook shelf - and I had totally forgotten about two cookbooks my mother gave me right after I was married.  “Make-A-Mix Cookery” and “More Make-A-Mix Cookery” by Karine Eliason, Nevada Harward, and Madeline Westover.  I remember this was quite a trend (way back then) and, like most food trends, enjoyed a following for a few years before convenience foods became all the rage.  

I've tried two of the recipes using this mix.  They both turned out great - looking (and more importantly) tasting like homemade.  I gave all my mixes away to my grandchildren, but kept a few to make up to send to my missionary son.  

(These 'Cafe Rio' style takeout containers worked well to package & ship cookies in... I stuffed the empty space with waxed paper, put on the foil-backed cardboard lid, and folded the edges over to seal.  I'll have to ask him what shape they were in when they arrived)


Peanut Butter Blossoms - which melt in your mouth (but like any good peanut butter cookie) yet, you'll still want to reach for a nice glass of cold milk to dip them in.  They have a nice crackly surface, and they are moist and chewy for days.  The link for this recipe is HERE.


These Holiday M&M Cookies are also very good.  Unlike Nestle Toll House type cookies, they have a more "cake-like" texture.  They remain chewy for a few days also.  Because the dough is more moist, it wreaks havoc with the red & green M&M's - but chocolate chips wouldn't have that problem.  This cookie recipe link is HERE.

But before you make either of these, you'll need to make a batch of the Basic Cookie Mix recipe - which is at the link below:


* (check back for a really versatile homemade Brownie Mix soon)

Friday, May 13, 2011

Sprouting - a taste of Spring!


This is not a new idea, but after months of clouds & rain - it was a welcome touch of green to bring indoors with very little effort.  Who knew you could be mowing your “lawn” within 4-5 days after beginning this fun activity.  Besides being a beautiful, fresh centerpiece, you can use sprouted wheat several other ways.


I needed a centerpiece for a dinner last month - and I decided to try indoor sprouting.  Unlike a lot of people in my area - I’m not a rabid “food storage fanatic”.  I use my wheat in wholesome homemade bread... and that’s IT!  But now I’ve learned how simple it is to sprout it - I’m never going back to plain bread.  

But this post is not about homemade wheat bread (check back in a few days for my new favorite sprouted wheat bread recipe).  This was too much fun to not share with you.

I needed an appetizer, so I decided on fresh vegetables.  I found several ways to cut them into flowers & other shapes to spring out of a grassy centerpiece.  (I’ll share that with you also in an upcoming post) 

If you want to know how long it takes to grow grass that’s a few inches high - give it 4-5 days.  There are just a few tips to pay attention to, and that’s what you’ll find in the link at the very end.  You can’t fail at this elementary school project (whew!)

You can “plant” just about anything in this grassy landscape.  I found this technique several places on the web, but the one I thought was most helpful was on growwithlauren.  This talented gal (my daughter's former college roommate) shows several ways to involve children in this great activity, especially in the dead of winter.  

It really is amazing how much potential there is in a grain of wheat (kind of reminds me of our potential as sons and daughters of God?)  Have a little fun with this taste of Spring.

For a step-by-step tutorial with photos of the whole process - go to:

Tuesday, February 1, 2011

Heart Warmers


This is certainly not a new idea.  Maybe you are experiencing the “Massive Winter Storm” that is affecting most of the country today.  Although it takes a lot more than hot cocoa to keep you warm on a day like today - just the thought of it warms me from the top of my head clear down to my toes.

Don’t you love to receive a gift that is complete?  Where you don’t have to measure, portion, or THINK?  This one is just that - open, pour, and stir.  
And the fact that it looks like something cold, yet warms your heart makes it even more appealing.  


If you need a gift idea that is quick to assemble, fairly inexpensive, and fits with the season of love - you can’t go wrong with these little tubes of warmth.

Although any miniature marshmallows will do - you will need to be on the ball to purchase these heart shaped ones before they’re gone.  I’ve only found them in a few stores.  The fact that they are supposed to be “strawberry” shouldn’t make you worry that they don’t taste good in a flavored cocoa.  I even enjoyed mine in mint truffle flavored cocoa.  

Any red candy will do - but I would avoid cinnamon hearts (unless you enjoy cinnamon in your cocoa).  It’s hard to find regular gumdrops right now that aren’t “spiced” - but if you look, you’ll find assorted packages.

I made mine in two sizes, as shown.  You can get crazy with ribbon, but it might detract from the “ice cream cone” design.


For instructions (with my own discoveries to make it easier) - along with step-by-step photos - go to:

Saturday, December 18, 2010

Simple (and appreciated) gift for your elderly friends.


This post is short on 'cutesy' and more on the practical side - with few step-by-step instructions and photos.  Yet, I'm hoping it will bring to mind a few ideas for bringing some healthy cheer to someone who needs a little lift this holiday season.


In my church I serve in my Stake Relief Society organization.  This time of year there are many opportunities to serve others, give gifts, and try to personally contact those who might be especially lonely this Christmas.


In our Stake, there is a special group of women residing in a care center for the elderly.  Most of these women are in ill health and have no family.  Their Branch Relief Society presidency spends almost every single evening at the care center - checking on them, cheering them, and uplifting them.   These women give such unselfish service - and yet, they have their own families to care for too.  The past few years, each ward Relief Society presidency in our stake takes a turn providing a fun evening with these sweet elderly women.  We decided we needed to spend an evening with them as well.  


But what to bring that would be appropriate?  The typical holiday sweets are just too rich for people this age - and so we brought fruit.  Fruit baskets are the norm - but we thought that would be too inconvenient for them to eat without a lot of assistance.  Instead of bringing a fruit tray, I decided to prep the fruit and then portion it into individual disposable containers so they could take it back to their rooms that evening.   I also  included a small plastic fork and a napkin.  They were really pleased, and most of them polished theirs off completely before they went back to their rooms that night.  


You might enjoy these simple tutorials on how to prep fruit to make it look extra-appetizing...  (And you are right, fruit is really not economical this time of year - but if you had a choice, which would you take - cookies/candy/fruitcake - or THIS...)  


Cantaloupe "Peel & Cut 101"


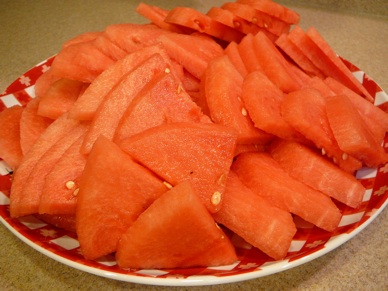
Watermelon Wedges 101


Peeling a Kiwi


Fruit Dips (caramel & orange)


Fruit Dips (sweet & tart)