Showing posts with label food storage. Show all posts

Saturday, November 8, 2014

Favorite Granola


I'm a new convert to Granola.  It's my new "legal" snack food - low sugar, lots of fiber, and the crunch is really wonderful.  I usually keep a small "kid-size" disposable bathroom-size drink cup (which holds about 1/4 cup) within reach during the day filled with this granola.  It saves me from refrigerator raiding about 2-4:00 in the afternoon.  I also love it on greek yogurt with frozen tri-berry mix for breakfast. 

This is a combination of a few recipes I've tried.  I've changed it slightly from my daughter (Aryn's) recipe, and the dry milk gives it a great flavor and texture.  I've also really loaded it up with walnuts, which I realize are not everyone's favorite.  Walnuts give it such a great flavor and crunch.  Sesame seed is also an unusual addition - but try quinoa, chia seed, and any/all ingredients you love to make it YOUR favorite.

Favorite Granola


Ingredients:

5 cups oats (I used "thick cut" oats from the bulk foods area of my grocery store)
1 cup non-instant nonfat dry milk powder
1/2 cup sesame seed (optional)
1/2 cup flax seed (can be ground, if desired)
1/2 cup packed brown sugar
1/2 cup honey
1/4 cup water
1/2 cup olive oil (light)
1-1/2 tsp real vanilla
2-3 tsp cinnamon (to taste)
2 cups (+ or -) coarsely chopped walnuts, or nuts of your choice
1 cup golden raisins

Directions:

Combine oats, nonfat dry milk, sesame & flax seeds, and cinnamon in a large bowl.  Mix well.  (Do not add raisins at this point)


In a large microwave safe measuring cup - measure out oil, honey, and water.  To this mixture add brown sugar, then microwave on high until sugar is completely dissolved.  Add vanilla and stir until combined.


Pour liquid mixture over mixed dry ingredients. Stir until completely combined.

Pour into a large, heavy baking sheet.  
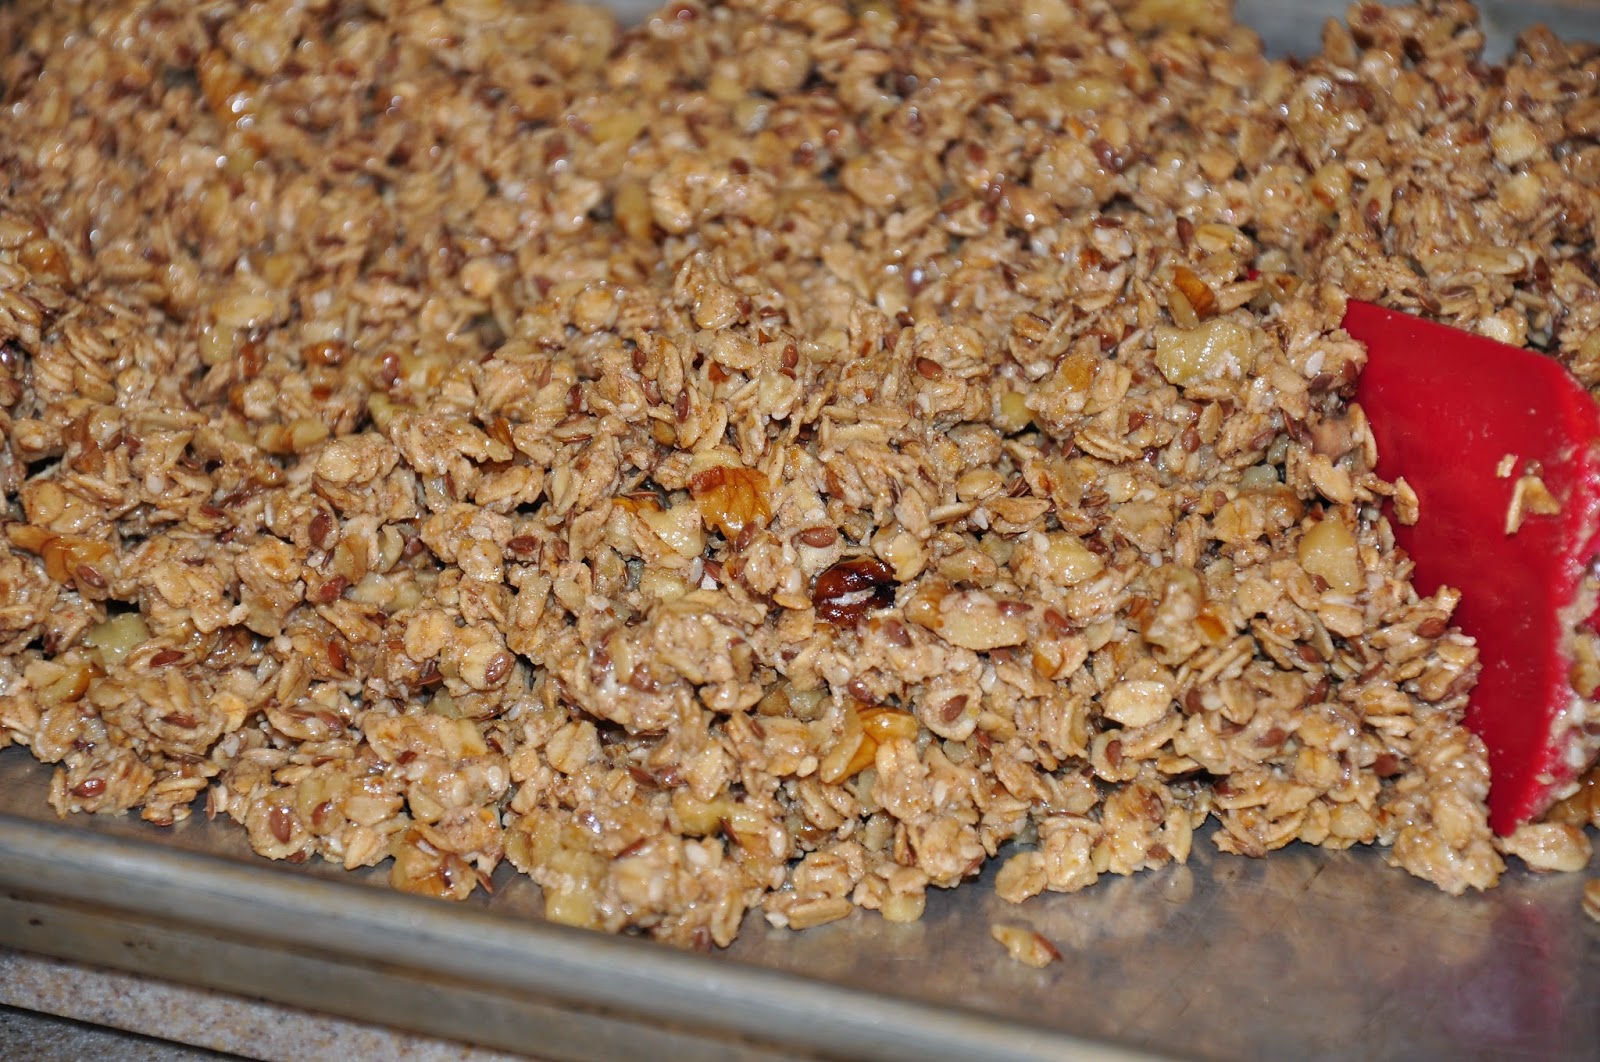

Place in 275° oven and set timer for 35-45 minutes.  Remove every 15-20 minutes to stir and redistribute granola.  

Add raisins about 5 minutes before baking time ends.  If you add them at the first, they will probably burn.


You may bake this until it is crunchy, but about 40 minutes makes it how I love it - "chewy", yet with a little crunch. 


Remove from oven and allow to cool completely before breaking up and placing in airtight container or ziplock bag.

Monday, January 21, 2013

After-Christmas Beans & Ham


Have you ever been guilty of slipping the ham bone into the trash (and making sure nobody saw you?)  I admit I’ve done that a few times, but I was raised to never waste ANYthing that could be used.    My mother taught me that time is your friend when trying to get every meaty scrap off a ham bone.


Usually a good week or two goes by before I am even the least bit motivated to deal with a ham bone after Christmas.  This year I was early - I had my HoneyBaked Ham bone made into this hearty soup by New Year’s Eve.  


Key to success here?  Soak your beans overnight, and you are halfway there.  This year I used Great Northerns - a very soft-textured bean compared with the ones I used to use (standard red beans).  I have to say - these were a good choice.  They are so mild that they take on the rich taste of the ham and you hardly know they are there.


If you are using the bone from a spiral-sliced (and glazed) ham - throw it ALL in - including the glaze and all the scraps.  The glaze makes the broth very rich and slightly sweet.  


After simmering all day long, you’ll notice every scrap of meat has fallen off the bone.  I use my tongs to remove it all, then I clean it up and remove all the fat and the gristle (which has turned completely soft).  I dice the meat into bite-size chunks and return it to the broth.


Not much need to add anything in the way of spices - and especially NOT salt.  The ham bone has all you need (and more).  


To dilute the salty broth, you can add more water without losing flavor.  Depending on how well your ham bone was trimmed, you may need to skim off a layer of fat after cooking.

For this simple recipe, go to:
www.changeabletable.com

Friday, May 20, 2011

Sprouted Wheat Berry Bread


If you’ve never tried sprouted wheat bread - I'm going to try to motivate you.  I used to (secretly) think that those who liked anything “sprouted” were tree huggers, or a bit “granola”.  I’ve obviously changed my mind - because I’m neither.  I used to buy this bread, but now I’ve found a great way to make it myself.


There’s a local brand of sprouted wheat bread (Granny’s Delight) that I’ve used for years - (and paid quite a premium price for, by the way).  It makes fabulous toast - which is the ultimate proof of a good loaf of bread.  I tried making cracked wheat bread to achieve that same texture (recipe HERE) - which is good, but this is now my preference.

I also tried just soaking cracked wheat - which helps.  But there’s something about achieving those cute little sprouts that really changes the whole flavor and texture altogether.  
Yes - it does take preplanning and forethought to soak and sprout your wheat a few days before.  That’s the price you pay for greatness.  No shortcuts here.

I always knew sprouting wheat was a good idea - I was, after all, raised in an LDS home where wheat was considered the “Staff of Life”.  My mother took all those classes in Relief Society - where they taught you how to make your own wheat anything.  

I have learned now that sprouting grains & beans makes them better for you.  It increases the vitamin C, folic acid, niacin, and riboflavin as much as 100 times when compared to unsprouted.  Sprouted grain breads are also higher in protein because of the sprouting process.  
When you sprout wheat, enzymes grow that help break down and neutralize phytic acid.  Without this acid present, it allows your body to absorb more zinc, calcium, copper, iron, and magnesium - making whatever you make with it better for you.

Eating bread made with spouts helps diabetics keep their sugar levels more even - because of it's low glycemic index.  

All these benefits aside - I sprout because it gives a unique earthy and nutty taste to bread.  All the other benefits are frosting on the cake (wait - can you make frosting from wheat berries?  No?)

For detailed recipe, instructions, and photos of the entire process - go to:

Tuesday, April 26, 2011

Food Storage Fudge


If I were to print the real title for this fudge, I could host a competition in how fast you can “click away”... After all - who worries about fudge in their food storage anyway?  If you have an extra can of beans (pinto beans for instance) that you aren’t motivated to use right away - you’ll be surprised at what they can yield. 


So... why Pinto Bean Fudge?  I made this to take as a sample to one of the ward conferences that I visit as part of my church calling in the Stake Relief Society.  Our Stake Presidency asked us to put together and present a Powerpoint presentation on how to navigate (and use) a marvelous website called providentliving.org.  This website teaches how to live “providently” - a novel concept for the economic climate we are all experiencing right now.
You’ll find many resources there to help you in your efforts to live providently.  We recommended using a Food Storage Cookbook - which is where we found this recipe for fudge.  

Now, granted - food storage is not a way to stockpile fudge.  But - it is a great way to use old dry beans.  If you have had dry beans stored for years - check this resource out (HERE) to know how to prepare them to use in this recipe.

I have to admit - when I made this and took an initial taste - I was less than impressed.  I let it stand (covered) overnight and took it to my meeting - ready to apologize for it’s nastiness.  


I was surprised that everyone who tasted it loved it, so I gave it another chance.  It had miraculously morphed overnight.  My explanation is that the beans somehow softened and the grittiness disappeared as it mellowed within a few hours.


For this 'food storage' recipe - go to:

Saturday, January 29, 2011

Basic Bosch Whole Wheat Bread


This oh-so-basic whole wheat bread can be made in any brand of bread mixer - but I want to give credit to the dealer (the Sandy Bosch Kitchen Center) who shared the recipe.  I took their class twenty years after my husband gave me my (now ancient) Bosch mixer.  It is simple, and as long as you have good yeast - failproof.  


Lately all I want for breakfast is a thick slice of homemade whole wheat toast with frozen strawberry jam.  Not a lot to ask, right?  But why does it take me so long to talk myself into actually making it?


Could have something to do with getting out my wheat mill.  I love it as much as I love my Bosch mixer, but it's a real commitment to use it.  I don’t relish the idea of cleaning up a fine dusting of wheat flour from every surface in my kitchen, and also it sounds like a jet engine as it runs.  So... when I want to use it - I take it into my garage and make a day of it.  I grind several extra cups which I then put in gallon size ice cream buckets and keep in my extra refrigerator.  

There’s nothing like freshly ground wheat flour - warm from the grinder.  That little bit of extra warmth from being ground really makes the bread rise even better.  When I want to use the excess that I've refrigerated, I have to remember to let it come to room temperature so it doesn’t slow down the yeast.

This recipe uses the products that stores (such as Bosch and other food storage related retailers like them) promote.  I agree that dough enhancer, vital wheat gluten, and lecithin really do make a difference.  Especially the lecithin.  Lecithin looks (and smells) scary.  When I take it from the refrigerator where I store it - it reminds me of petroleum jelly mixed with oil (nice, huh?).  But it is nutritious, makes the dough less sticky, and helps it rise.  I also think (although I can’t prove it) it makes the bread last longer without spoiling.

I prefer the texture of Ninety Minute Wheat Bread (recipe HERE) - but this recipe is a classic for using your food storage wheat.  And, as long as we are talking wheat - have you tried hard WHITE wheat?  So much better than hard winter red wheat (that I have enough to feed the world with in my basement).

For this recipe, along with (lots) of detailed instructions & photos - go to:

Thursday, November 18, 2010

Food Storage 'Fluke'


I took the last week off to spend as much time as possible 
with this great looking missionary son. 


I dropped him off yesterday at the MTC to begin his mission 
- and now I'm wandering around like a lost soul.  


He was my last one at home - and I'm still in shock.  

You'll probably notice a shift in my cooking soon - more "empty nest" than "full house".  Sigh.  But (I've always found) my family still comes home often 
- and that's when I switch gears back into quantity cooking just like all those years before.


This recipe was an ‘accident’ that came about when I was really grasping at straws for ideas for dinner one evening.  
I started with a pound of hamburger, 1/2 can of leftover spaghetti sauce, and grated cheese.  My food storage room provided the rest.  
My grown up kids still ask for this simple dish, and I have no idea why!

I sometimes use ground turkey for a change, and when I do I swap out the spaghetti sauce for Small Batch Pizza Sauce (recipe is HERE).  
It’s a real hit with kids.  You can also feel good about serving it as a “lighter” dish.  No one will know the difference (but you). 


I was surprised at how satisfying this pasta dish was - even with ground turkey as it’s mainstay.  The addition of chunky pizza sauce adds interest and lots of flavor to otherwise bland ground turkey.  Usually dishes of this type are high in fat, but using ground turkey keeps it light - yet still zesty.


So next time you find yourself staring aimlessly into your pantry for ideas 
- give this one a try.  It's not gourmet, but satisfying nonetheless.


For the recipe, go to: